A pouch kit is only as useful as its fabric, paint, design guide, and curing instructions. By checking those details and using the right preparation, painting method, and care routine, you can choose a kit that produces a flexible, usable pouch rather than a stiff or peeling decoration.
Key takeaways
- Confirm pouch size, fabric, lining, zipper, and quantity before buying.
- Choose flexible fabric paint and apply thin layers to prevent stiffness.
- Keep paint away from zipper teeth and allow each layer to dry fully.
- Compare kit contents, supervision needs, and local availability in Mumbai or Goregaon.
Check what the canvas pouch painting kit actually contains
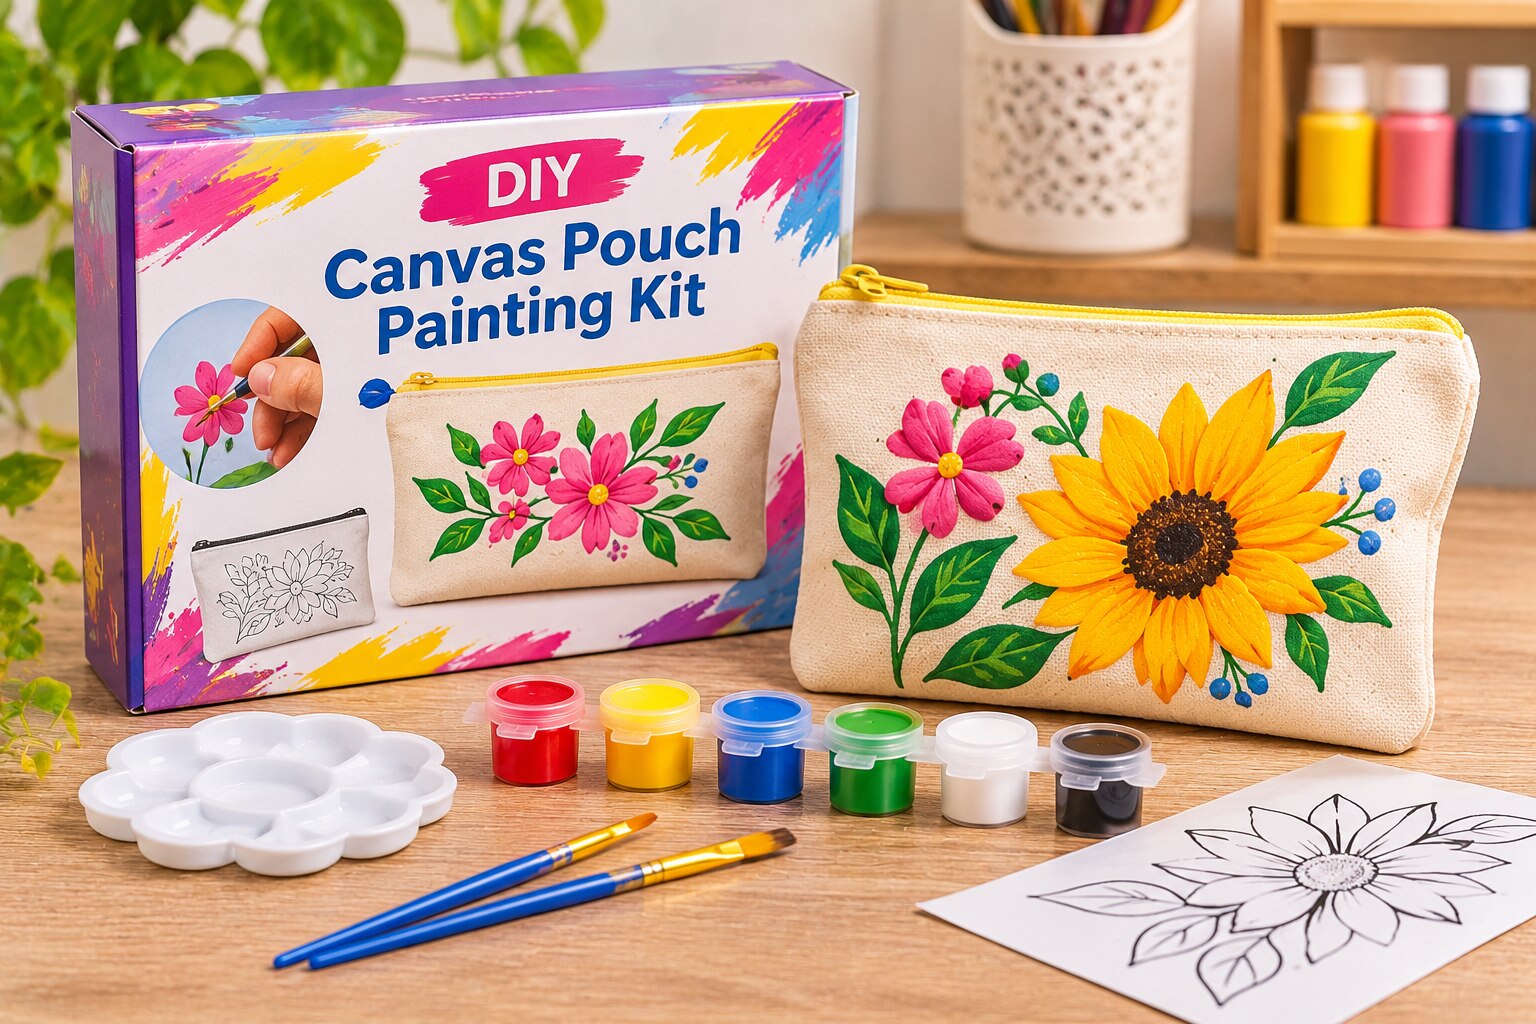
Confirm the contents before buying a canvas pouch painting kit in Mumbai. Check the number of pre-sewn pouches, each pouch’s length and width, cotton or synthetic canvas, fabric weight and weave, lining, and zipper construction. Ask whether it is intended for repeated handling, such as a pencil pouch, or decoration with light use.
| Design format | What you receive | What you must do |
|---|---|---|
| Blank pouch | Plain fabric with no artwork | Transfer or invent the entire design |
| Pre-drawn pouch | Light outline showing image placement | Paint within or over the guide |
| Pre-printed pouch | Image already printed on the fabric | Choose colours and apply the paint |
Confirm the rest of the pack in writing:
- Paint colours and volume, including whether the set has mixing white; brush types and sizes, such as one small round and one broader brush; and a palette or mixing surface.
- An insert board, stencil or printed outline, drying and heat-setting instructions, and packaging that protects the pouch and prevents paint bottles from leaking.
- Whether the paint is textile paint or ordinary acrylic. Acrylic alone does not make a wash-ready textile kit; it needs compatible textile-medium instructions or brand-specific fabric guidance.
- Whether dark fabric needs an opaque textile undercoat, since transparent paint will not cover it like it covers white canvas.
A thin pouch, sample-size paints, disposable brushes, or missing care instructions can make a low-priced kit cost more to complete.
Prepare the pouch and select paint that can flex with fabric
Flatten creases before painting; wrinkles can shift the design and leave uneven coverage. If the paint maker permits it, prewash a washable pouch without fabric softener, then dry it completely. Softener can leave a coating that weakens adhesion.
A DIY canvas pouch painting kit bought from a painting materials shop in Mumbai is easier to control when you prepare it as follows:
1. Test a small amount of paint on a hidden seam or spare fabric. Check adhesion, colour, stiffness, and wash instructions before committing to the front panel.
2. Slide a removable cardboard or plastic insert inside the pouch. It stops paint reaching the back panel, but remove it before ironing or heat-setting.
3. Keep the fabric flat with clips or low-tack tape. Do not place tape over the painting area, and keep paint away from the zipper tape and teeth.
4. Follow the paint maker’s instructions for heat-setting, ironing temperature, duration, dryer curing, pressing-cloth use, and textile-medium ratio. There is no universal setting.
| Option | Fabric performance | Practical decision |
|---|---|---|
| Textile paint | Flexible and washable when cured as directed | Best choice |
| Ordinary acrylic | Can dry into a stiff film that cracks when bent | Use only with fabric-specific guidance |
| Acrylic plus textile medium | More flexible when mixed at the stated ratio | Follow both labels |
| Poster colour or watercolour | Weak, non-durable textile adhesion | Avoid for washable pouches |
| Oil paint | Dries slowly and remains impractical for a quick project | Avoid for this activity |
Paint in thin layers without stiff fabric, bleeding, or zipper damage
Use a numbered sequence to keep the pouch flexible and the zipper clean. A beginner using a diy painting kit goregaon can follow these steps:
1. Transfer the outline with a fabric-safe pencil or use the supplied stencil. Keep the cardboard or plastic insert inside, and support the panel on a flat surface so wet paint cannot pool.
2. Test the first colour on a hidden seam or spare canvas. Paint the broad areas before small features, applying thin coats rather than scraping thick paint across the fabric.
3. Let each coat dry before adding highlights or dark outlines. Use a small round brush beside seams, and leave both the zipper tape and teeth completely free of paint.
4. Limit your palette and mix white to lighten colours. Metallic, fluorescent, pale, and transparent paints cover differently from ordinary opaque colours; transparent paint will not hide dark canvas without an opaque undercoat.
5. Press low-tack tape along an edge or stencil to reduce fuzzy borders, and lift it before the paint forms a hard ridge. Thin coats also reduce bleeding and cracking.
Absorbent canvas consumes more colour than tightly woven or coated fabric. Excess paint creates a stiff film that cracks when the pouch bends, so add another dry coat instead of loading the brush.
Keep the insert in place until the front is dry, then touch the surface and press clean paper against it; wait if it feels tacky or transfers colour before painting the reverse side.
Plan the activity around drying, washing, skill, and supervision
Completion time depends on design complexity, paint layers, drying conditions, and group size. A child or beginner will finish a simple single-side design faster than detailed outlines with multiple coats; a school class or party group also needs time for distribution, spills, and individual help.
An adult hobbyist can attempt greater detail, but drying still controls the schedule.
- Plan one session for painting and another for handling the finished pouch. Keep the insert inside while painting, then allow the pouch to dry and cure for the period printed by the paint maker before folding, packing, or washing.
- Check the surface before moving or painting the reverse side. Paint that feels tacky or transfers colour needs more drying time.
- Hand-wash only when the paint label permits it. Use cool water and mild detergent; do not soak the pouch or scrub the painted panel aggressively.
- Dry it away from prolonged direct heat, and store it with the painted panel protected from rubbing against rough or damp items. Test washing on a hidden area or spare fabric first.
- Iron only when the paint instructions permit ironing. Remove the insert, follow the stated temperature and duration, and use a pressing cloth when the instructions specify one.
- Before giving the kit to a child, ask for the exact printed age guidance, inspect loose parts, read paint warnings and safety information, check the manufacturer and batch details, and ask whether adult supervision is recommended for painting, cutting, or ironing. Treat “non-toxic” as confirmed only when the label states it.
Compare local kits before you buy in Mumbai or Goregaon
A low kit price can hide sample-size paint, a thin pouch, or missing tools. If you searched buy canvas pouch kit in mumbai, treat the catalogue title as unconfirmed until the retailer verifies the pack contents and current stock.
- Ask whether the pouch is cotton, polyester, or a blend; request its length, width, fabric weight, weave, lining, zipper construction, and intended use.
- Confirm the paint volume and type, brush sizes, insert board, stencil or printed outline, mixing tray, packaging, and complete drying, curing, and heat-setting instructions.
- Ask whether the price includes the pouch, paints, tools, packaging, and delivery or pickup.
- Compare the included paint volume and blank-pouch cost separately with loose textile paint and a loose pouch.
- Ask for current stock by colour and pouch size; seasonal availability can change.
| Option | What you receive | Check before choosing |
|---|---|---|
| Kit | Pouch and selected materials | Confirm textile paint, usable quantities, and omitted tools |
| Loose materials | Separate pouch, paint, brushes, and insert | Better control, but you assemble and match everything |
| Acrylic-only kit | Ordinary acrylic colour | Add a compatible textile medium only when the paint and medium instructions permit it |
At a painting materials shop goregaon, ask whether the pouch suits a washable pencil pouch, cosmetic pouch, or decorative use. ART & CRAFT SUPPLY STORE MUMBAI can answer these questions, but record which details come from the sealed pack and which come from the retailer.
Resin pigments and solvent colourants are not substitutes for textile paint.
Related product
 | DIY KIT ART ₹249 RETURN GIFT FOR BIRTHDAY ,CHILDREN DAY , ANY FESTIVAL FOR ACTIVITY FOE STUDENTS ,AND CHILDERN FOR FUN DIY ART KIT View product → |
Frequently asked questions
What should a DIY canvas pouch painting kit contain?
Check the number of pre-sewn pouches, pouch dimensions, canvas material, fabric weight, weave, lining, zipper construction, paints, brushes, and instructions.
Which paint is suitable for a canvas pouch?
Use paint made for fabric that remains flexible after drying. Avoid thick paint layers that leave the pouch stiff or crack when handled.
How do you prevent bleeding and zipper damage while painting a pouch?
Place a protective sheet inside the pouch, apply thin layers, let each layer dry, and keep paint away from the zipper teeth and slider.
What should you compare when buying a canvas pouch painting kit in Mumbai or Goregaon?
Compare pouch size and fabric, included tools and paint quantity, drying and washing instructions, age suitability, supervision needs, and whether replacement materials are available.
Keywords